Prepare to embark on an exciting audio journey with Radiolize. In this guide, we’ll show you how to upload and edit audio files, empowering you to craft compelling, impactful content that leaves a lasting impression on your audience.
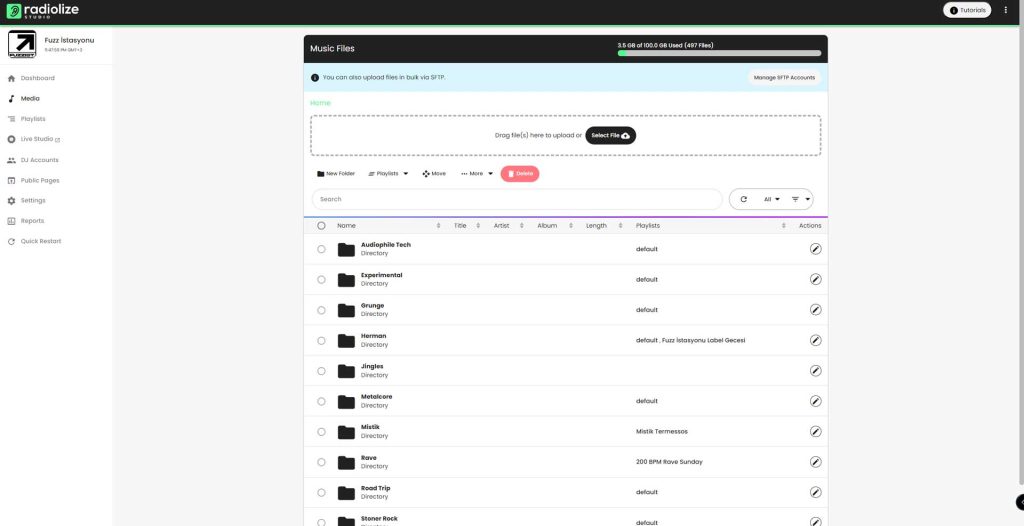
In your control panel menu, you will see “Music Files”. You can upload your music files directly to there by browsing or dropping files to upload box or you may create folders by genre or bpm and upload or move your songs to which folder you want.
We suggest you creating folders and uploading your audio file to folders for better browsing. Here is an example.

Then, click in the folder upload your songs by drag-and-drop or by selecting music files. You can upload multiple songs.
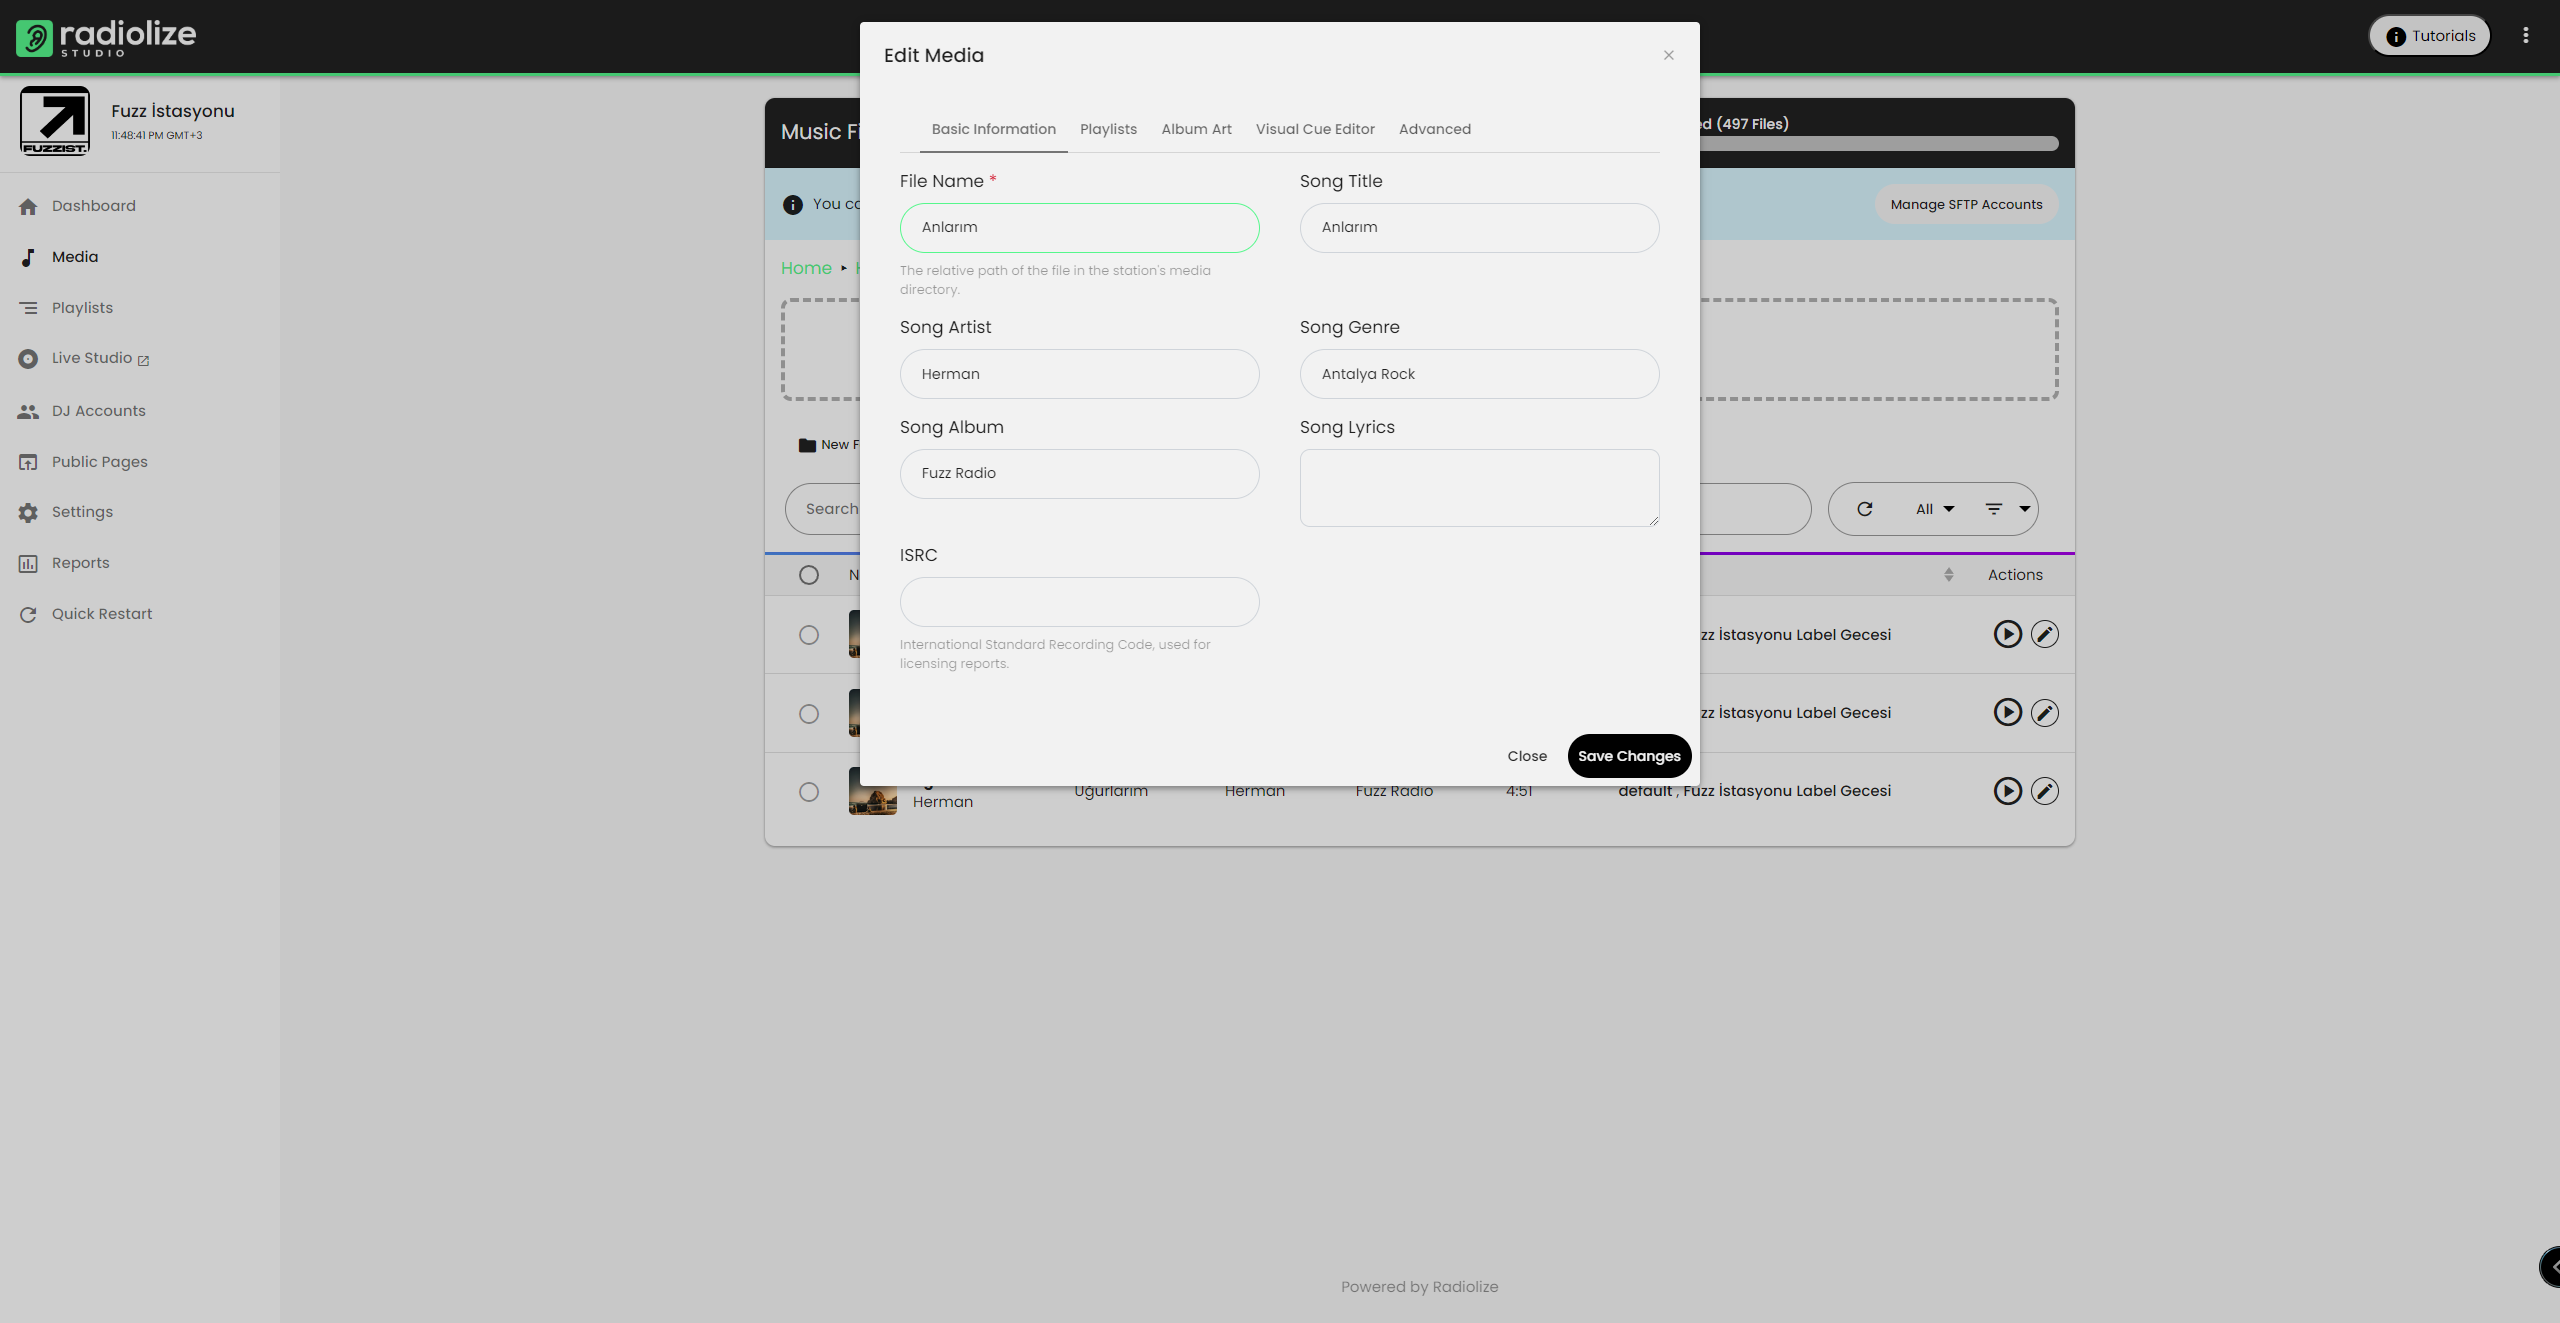
If you want to edit a song, you should click to “Edit”. You can edit song’s metadata, you can add International Standard Recording Code (used for licensing reports) and you can edit cue points.The metadata you add to your song is information that you may need later on when reporting to your professional associations, if required in your country. For this reason, it is useful to do it. For additional questions about licensing in internet radio, you can read this blog post. Lets quickly look at how meta screen looks like:

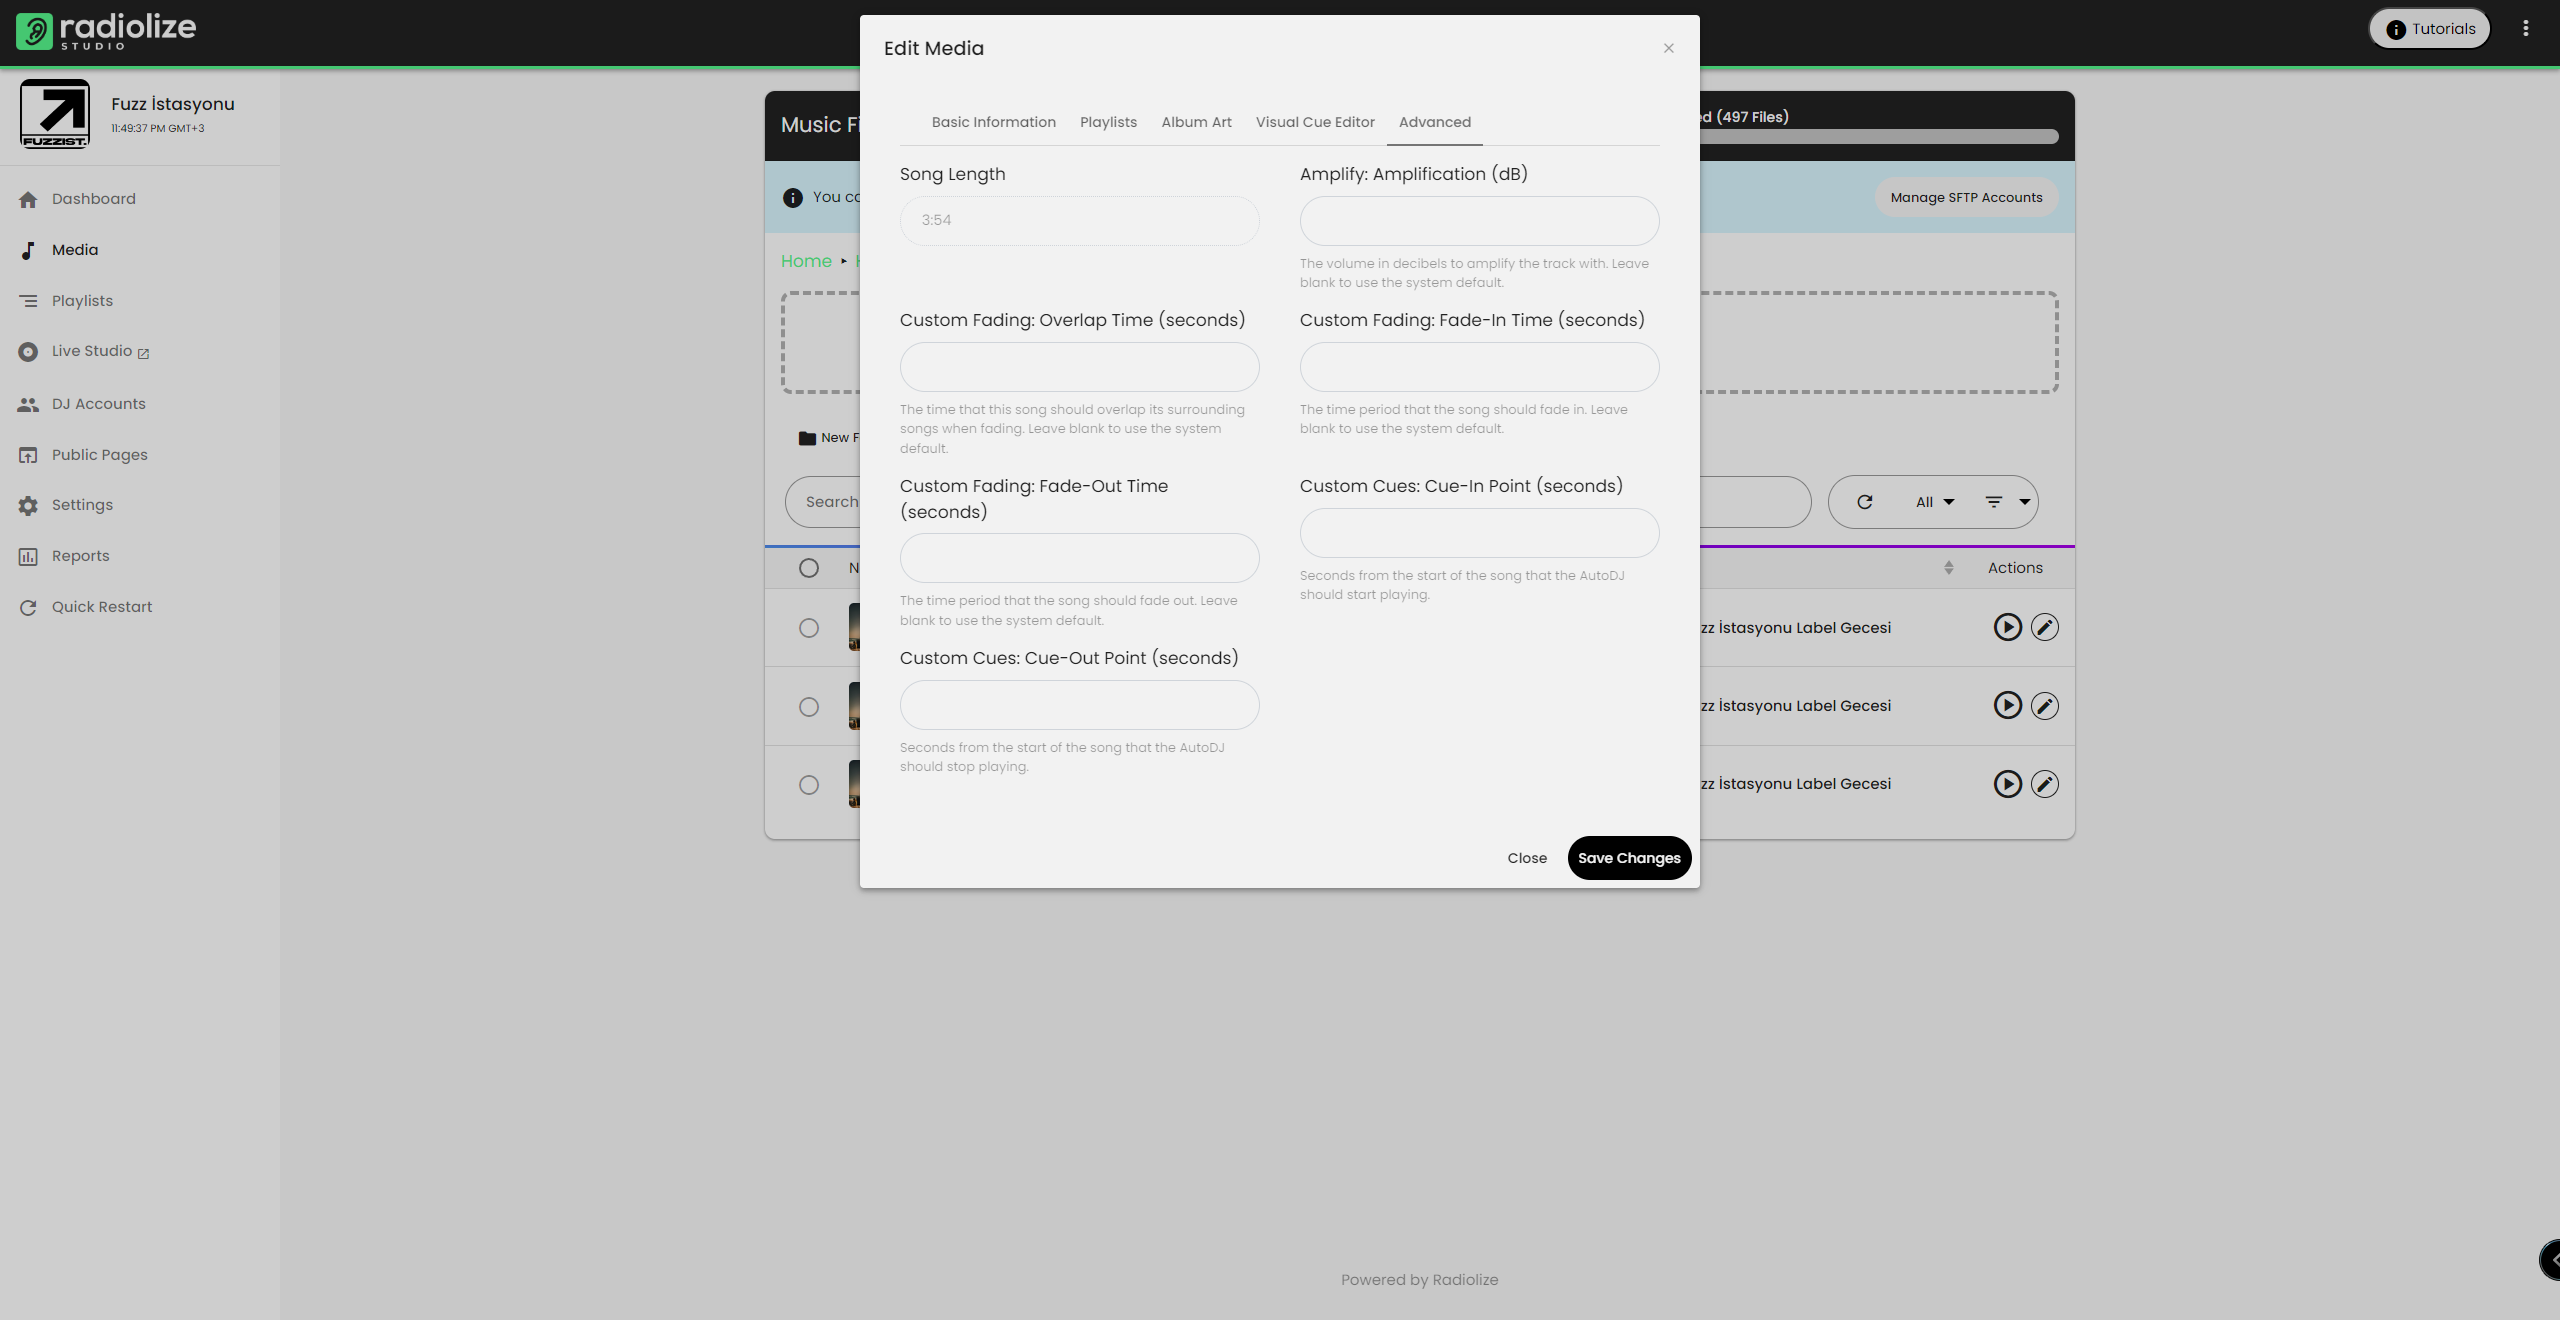
You may want to edit your songs cue points if there is silence or unwanted sound before or end of the song. Below meta side, there is “Advanced Control Song Playback” section. On the default, we have default 2 seconds of fade out at every Radiolize station. So you have to only use “Custom Cues” side. Don’t use “Custom Fading” and leave it free.
Let’s work on a example. You will see the total duration of a song on “Song Length (seconds) section. Let’s think we have to cut the first 5 seconds and last 5 seconds of a song as there are some unwanted sounds or silence on that seconds. So, here is the panel you need to adjust the values.


